![]()
Getting Symbolic in Flash
From cave drawings to today’s digital art and all the other in-between stages are symbolic of a picture that's worth a thousand words. In this issue of working with Macromedia Flash, we'll look at symbols.
A symbol is a reusable image, animation, or button. One common place for symbols is the Stage. Symbols help keep a file's size low while simplifying movie editing. They are used to create sophisticated interactivity.
 What's
a symbol?
What's
a symbol?
Each symbol has a unique Timeline and Stage, complete with layers. When
you create a symbol, you choose how it will behave and how you plan using
it in the movie. Graphic symbols are used for static images or to create
reusable pieces of animation tied to the Timeline of the main movie.
Button symbols are used to create interactive buttons that respond to mouse clicks, rollovers or other actions. You define the graphics associated with the various button states. And then assign actions to a button instance.
Movie clip symbols help create reusable pieces of animation. Movie clips have their own multi frame Timeline that plays independent of the main movie's Timeline. And you should think of them as mini-movies containing interactive controls, sounds, and even other movie clip instances; all within the main movie. You can also place movie clip instances inside the Timeline of a button symbol to create animated buttons.
Creating
Symbols
Creating a graphic symbol behaviour is easy. Just draw any shape or create
an object. Then using the Arrow tool, double-click the object to select
it. And choose Insert|Convert to Symbol. You can do this with any drawing
you create on the Stage.
In the Symbol Properties dialog, name your object. Then select Graphic as the behaviour and click OK. The object on the Stage is now an instance of the symbol. Deselect the symbol instance, select it again, and then move it. Notice that you can move it as a single object rather than as separate shapes.
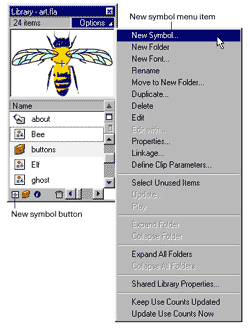
Flash stores symbols in the library. Each movie has its own library. Window|Library will open the Library window. Notice that the symbol you created appears in the list. Once you've created a symbol, you can use instances of it anywhere in the movie. Drag the symbol you created from the Library window into the work area. This creates a new instance of the symbol.
You can create several more instances. You can change an instance of a symbol without affecting other instances or the original symbol. Use the Scale and Rotate modifiers of the Arrow tool to change the instances you created.
You can also modify the colour properties of an instance to change the brightness, hue, or transparency. Using the Arrow tool, select the instance of the ghost in the work area and then choose Window|Panels|Effect. In the Effect panel, click the pop-up menu and choose Tint. Then click the Tint centre box and choose a green centre from the centre pop-up window. Enter 50%, and press Enter (a 100% tint completely saturates the instance with the centre). Notice that all the instances of the symbol change, but the variations for each instance remain the same.
Creating
buttons
Buttons are actually four-frame interactive movie clips. When you select
the button behaviour for a symbol, Flash creates a Timeline with four
frames. The first three frames display the button's three possible states;
the fourth frame defines the active area of the button. The Timeline doesn't
actually play; it simply reacts to pointer movement and actions by jumping
to the appropriate frame.
To make a button interactive in a movie, you place an instance of the button symbol on the Stage and assign actions to the instance. The actions must be assigned to the instance of the button in the movie, not to frames in the button's Timeline.
Each frame in the Timeline of a button symbol has a specific function: The first frame is the Up state, representing the button whenever the pointer is not over the button. The second frame is the Over state, representing the button's appearance when the pointer is over it. The third frame is the Down state, representing the button's appearance as it is clicked. The fourth frame is the Hit state, defining the area that will respond to the mouse click. This area is invisible in the movie.
Create all the instances of the button to provide a look of a read button. For an interactive lesson on creating buttons in Flash, choose Help|Lessons|Buttons. Next week we'll look at creating interactive movies
Readers who have missed the previous columns can check past Product Guides in the Archives section of IT@TT Onlineat www.careermosaicindia.com/itattt.
Vaishali
Singh
[email protected]
Other Articles
CareerCorner
| ChiefChat
| ProductGuide
| ProductReview
SiteScan
|
Techtalk
| VirusWatch
| Webware